Whether you’re taking photos for a paid gig or just shooting for fun, follow these simple steps to make sure your photos are high-resolution in order to avoid pixelated or blurry photos.
1. View Image Details
-
Checking Resolution on a Windows PC
- Select the file you want to use
- Right-click on the image
- Choose “Properties”
- Go to “Details” tab
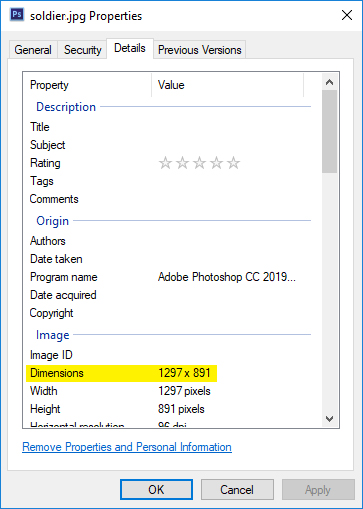
Windows PC-Avoid Pixelated Photos
-
Checking Resolution on a Mac
- Select the file you want to use
- Right-click on the image
- Choose “Get Info”
- Go to “More Info”
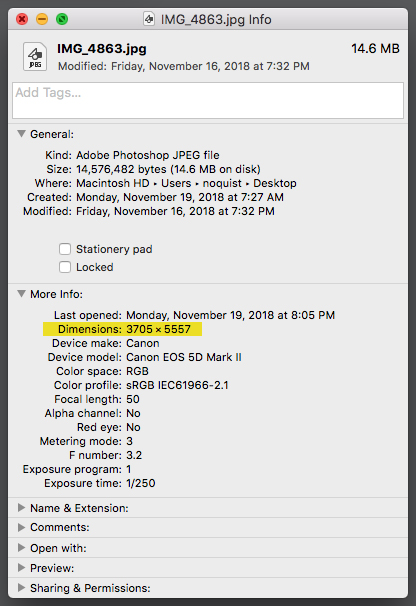
Avoid pixelated photos on Apple Mac computers
2. Check Dimensions
- Use conversion chart to verify the dimensions of your image will convert to the size you need to print.
- Images cannot be enlarged without losing quality and becoming blurry or pixelated.
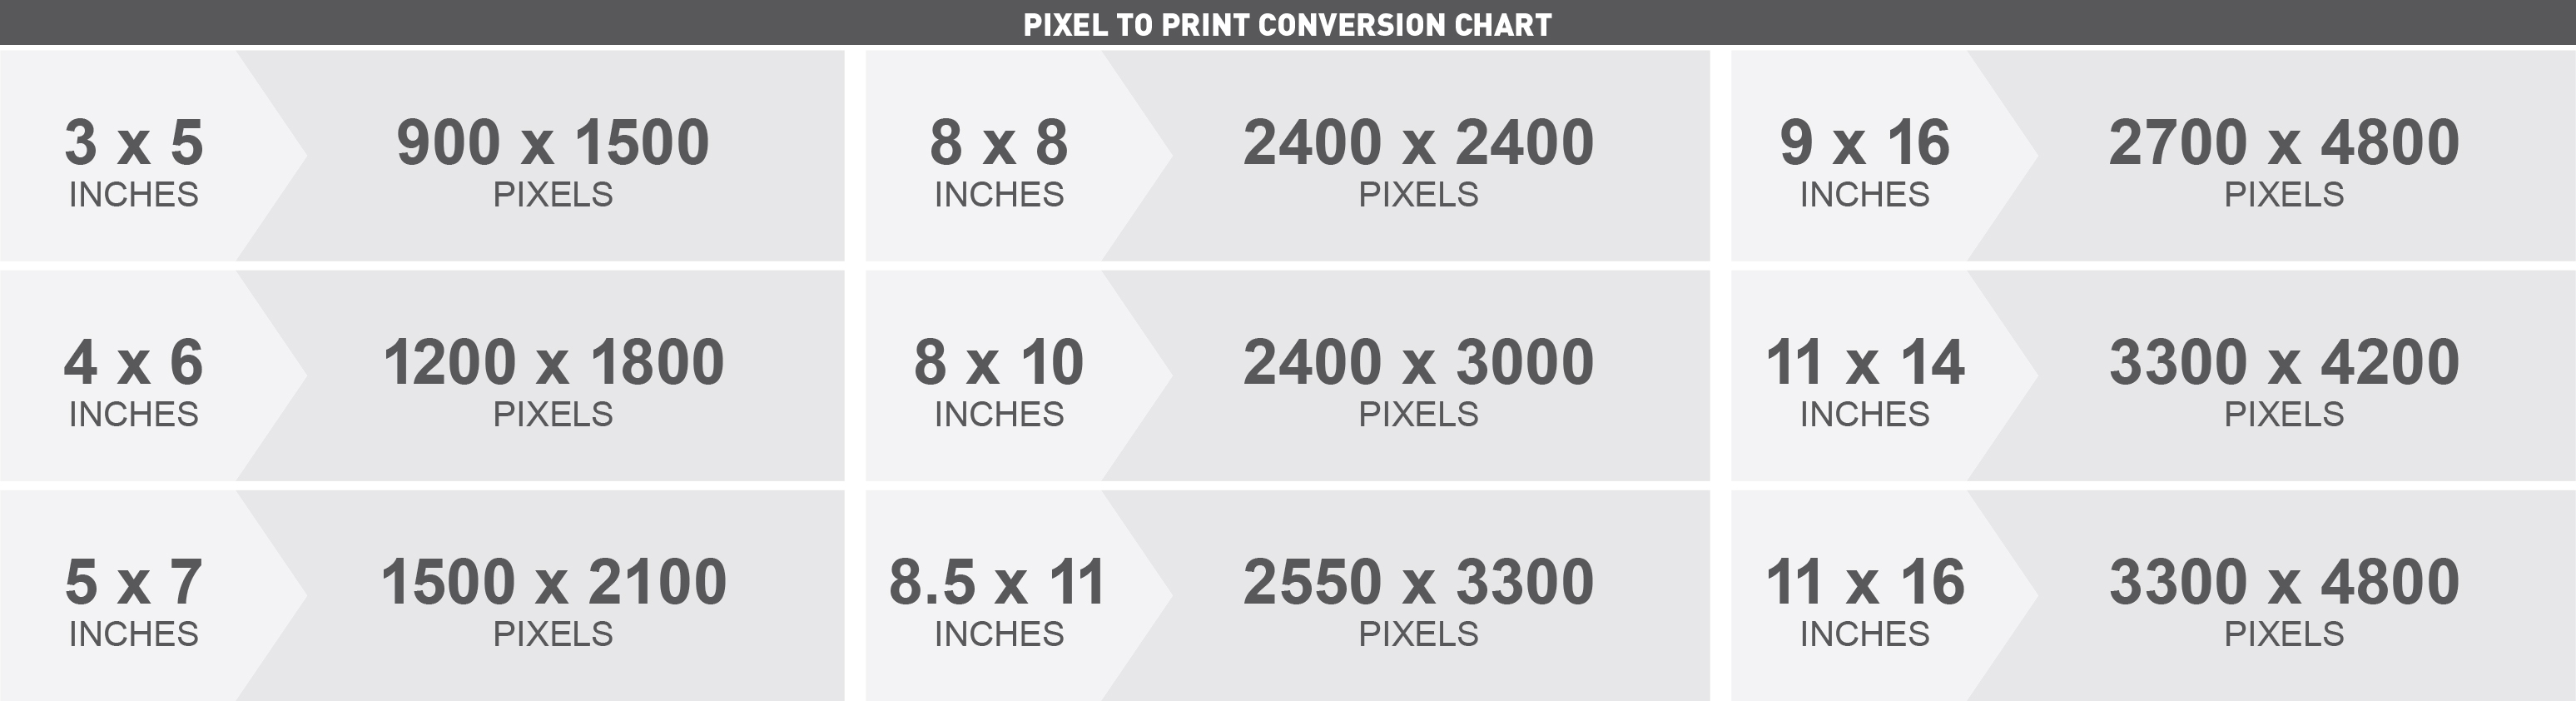
*Chart is based on 300 dpi images. For Large Format printing, at 75 dpi minimum, multiply inches by 4 for image size. For Photographic Large Format printing, at 175 dpi, multiply inches by 1.7 for image size. EXAMPLE: 3”x 5” image can be produced as large as 12”x 20” in Large Format and 5.1” x 8.5” in Photographic Large Format.

