New to graphic design? Curious about Adobe Creative Cloud? Let me walk you through the differences between Photoshop, Illustrator, and InDesign and what applications are best suited for various projects.
File Types: Raster, Vector, Desktop Publishing
Let’s start at the beginning. Adobe offers a suite of programs called the Adobe Creative Cloud. Photoshop, Illustrator, and InDesign are programs included in this suite.
First off, the programs each handle different file types. We’ve talked before about file types, now we’ll look at the programs that generate some of these file types.
Raster files (JPG, PNG, PSD, TIF), also known as bitmap files, are composed of millions of pixels. Photos and web content are a great example of raster files. Photoshop is used to create raster files. The issue with a raster file is that it cannot be enlarged past the size that it was created. You would never want to create your logo within Photoshop. Instead, use Photoshop for images within the other applications I’m about to explain.
Vector files (AI, EPS, SVG) are based on lines and shapes. This allows them to be used at any size without compromising quality. Illustrator is perfect for creating logos and design elements. The files can easily be produced on a multitude of mediums from offset printing, digital printing, screen printing, large format, and even easily converted for embroidery. Vector files can be scaled large enough to wrap the side of a building or small enough to imprint on an ink pen, all without losing the integrity and quality of the artwork.
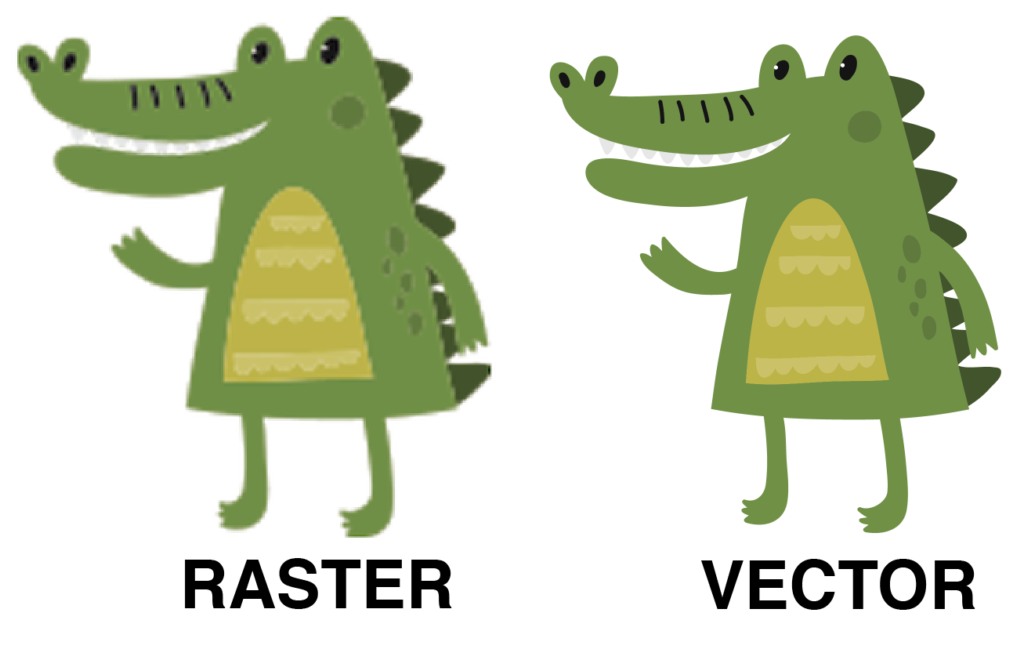
As you can see from the example below, when a raster file is enlarged it becomes pixelated and the edges appear jagged. A vector file when enlarged holds the quality and the edges are crisp and clean.
 This brings us to Desktop Publishing. InDesign is the ideal application for creating brochures, catalogs, flyers, posters, ads, books, and stationery. InDesign also has the ability to create interactive files. For example you can create a PDF file that
  contains links directing you to a specific URL. So let’s say you have a digital calendar where you want to feature specific products or recipes. You can add a hyperlink on the calendar that takes you right to the URL to view the complete recipe. This saves a ton of space in your layout by adding a link to more content. InDesign also gives you the ability to publish your design for electronic use, such as on a tablet, through Adobe Digital Publishing Suite. Basically, any project that requires flexibility in page layout with text, graphics, and images, InDesign is perfect. Here’s an example of a simple page that combines text with both vector and raster files. The textured background is raster and the alligator is vector.
Raster Files: Pros & Cons
If you’re dealing with photography you are living in the raster world. Raster files offer a tremendous amount of flexibility for artists to achieve a wide range of effects. Color blending, smooth gradients, photorealistic images, are all easily achievable with raster files. Some of this is possible with vector files, but it’s very time-consuming and challenging. Pixels make photo manipulation easy.
On the down side, rasters are very limited in their scalability. As I mentioned before, you cannot enlarge a raster file past the size it was created at without losing quality. For this reason, we ask our clients to provide their image files at a minimum of 300DPI (dots per inch) at 100% of the size they intend the photo to be produced. This is the standard for most offset and digital printing. In cases of large format printing you can often get away with 75DPI at 100% scale. Billboards for instance, are a long distance read so you don’t notice the pixels when viewing at a distance. However, if you were to get up close and personal with a billboard, you would see the large dots that make up the image. If you’re setting up files to be produced, you should always ask the vendor for their printing specifications prior to setup. The most important thing to remember is that, while you can adjust the size and DPI, you cannot enlarge them both without losing quality. One or the other will have to give.
Color matching raster files can be very tricky as well. Because the image is made up of pixels where the color blends into each other, it may be near impossible to get color specific.
Vector Files: Pros & Cons
The greatest benefit to vector files is their scalability. They can be any size you wish without losing quality and you will not have to worry about pixelation. If you’re working on a design that will be used across multiple platforms and at all different sizes, such as a logo, you will want to create a vector file.
Color selection is very easy with vector files, as you simply choose the shape and choose your color from your swatch library or color selector.
So what are the downsides to vector files? Well, if you’re looking to create a photorealistic graphic you will be highly challenged doing so with a vector file. Not only is it very time-consuming, but the file will quickly become complex, making the file size large and less manageable to work with.
It is possible to combine raster files with vector files, but I urge you to be very cautious. Doing this means your file is no longer truly vector. If you try to enlarge your graphic you will run into the same issues as you would with enlarging a raster file.
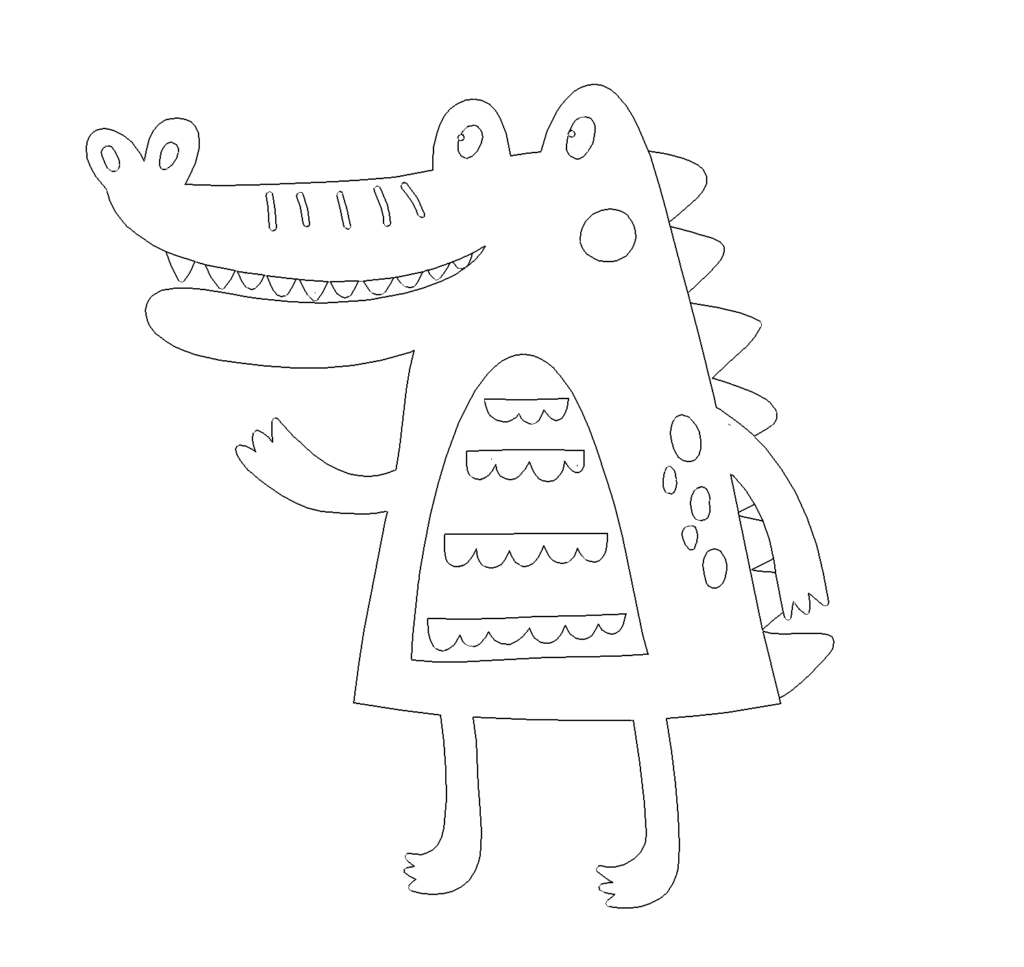
Illustrator allows you to view your vector file in outline mode, meaning it shows the edge of every shape in your file. Think of a vector file as if you have a sheet of white vinyl and an X-acto knife. You can only make hard edge cuts. There is no blending them. This is perfect if you intend to use your art for things such as screen printing or a cut vinyl sticker for example. If attempting to create a photorealistic graphic, you will end up with many more shapes and points making for a very large file that will not be so easy to manage. Let’s say you want to create a sticker. The plotter is going to cut on your path lines. If your lines are not connected, the plotter will not cut through. It’s very important to view the outline mode in this case.
Outline Mode
If you’re creating a full color logo with gradients and blends for traditional or digital purposes you should be just fine. Well, all of a sudden the boss wants to order embroidered shirts with this beautifully blended logo. You will now need to create a simplified version that consists of only flat colors. Obviously you can’t blend thread colors as you can ink. Another thing to keep in mind, is that the more solid colors you have, the more thread colors, and the more expensive your logo will be to embroider. This also holds true for imprinting on items where you may have limited or single color options. Having a solid, one color version of your logo is highly recommended. Ink pens with your company logo is a perfect example in which case you may only be able to imprint one solid color. Learn more about creating an effective logo and branding.
Desktop Publishing: Pros & Cons
When it comes to desktop publishing, InDesign is king. There is a plethora of options for formatting and editing text, creating content within tables, producing forms, creating templates with master pages, and the ability to handle both raster and vector content all within one program.
The weakness of InDesign is the limited illustration capabilities. There is a pen tool similar to that in Illustrator, but it’s not nearly as refined. It’s very basic, but that’s ok because you should be using Illustrator for all your illustration needs.
The other downside would be the lack of photo editing tools. You’re able to add a few basic effects to photos, such as drop shadows and edge feathering, but anything more than that you’ll need to use Photoshop.
As you can see, all three programs have their benefits and compliment each other very well. At the end of the day, the program you choose to work in completely depends on what you intend to do with your file in the end. If you’re creating logos, package design, t-shirts, or stickers, use Adobe Illustrator. If you’re editing, adjusting, or manipulating photos, by all means use Adobe Photoshop. If you’re making posters, brochures, or catalogs in which you are combining your photos, logos, and graphic elements with text and multiple pages, your best bet is Adobe InDesign.
My advice is to always determine the intention for use before you begin creating your masterpiece. If you plan ahead and think of all the options and variables beforehand, it will save you from many headaches later.

