This is a fairly easy visual guide to installing a Let’s Encrypt SSL on GoDaddy’s cPanel hosting accounts. A couple of things to note right from the start, Let’s Encrypt SSL Certificates are only issued for 90 days!
This means, every 90 days you will have to repeat this process. But don’t let that turn you off. SSL for free offers a very convenient account that lists the domains you’ve secured, and offers an easy click to renew button that will send you notifications to re-install. Best of all, this option saves you from paying the crazy GoDaddy SSL fee’s.
START
Start by logging into your GoDaddy account and keeping the window open.
Open a new tab or window (side-by-side) if you can and then head over to https://www.sslforfree.com
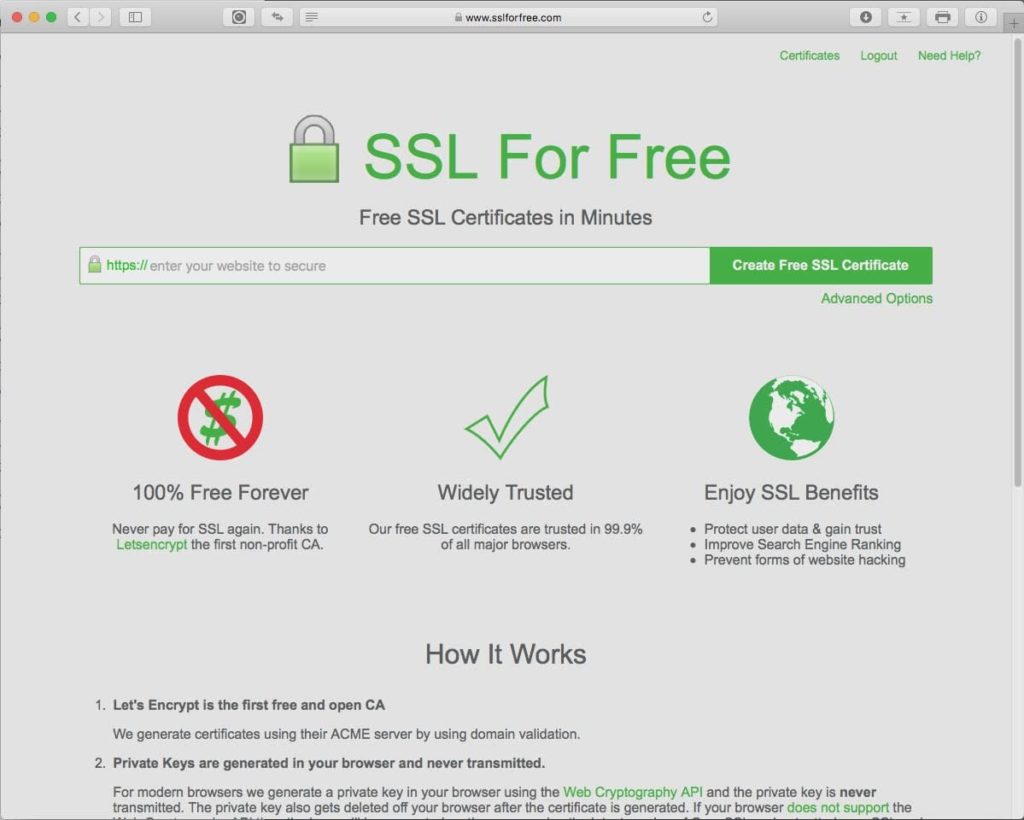
Type your domain into the certificate box. For this example I’m using the made up domain name: testdomain1.com – then click the Create Free SSL Certificate button to continue.

You’ll notice it will encrypt the WWW and Non-WWW domains. Later, you also see that it finds any GoDaddy related cPanel sub-domains (if this is an add-on domain and you have multiple websites on one hosting account), as well as the MAIL prefix for securing mail.
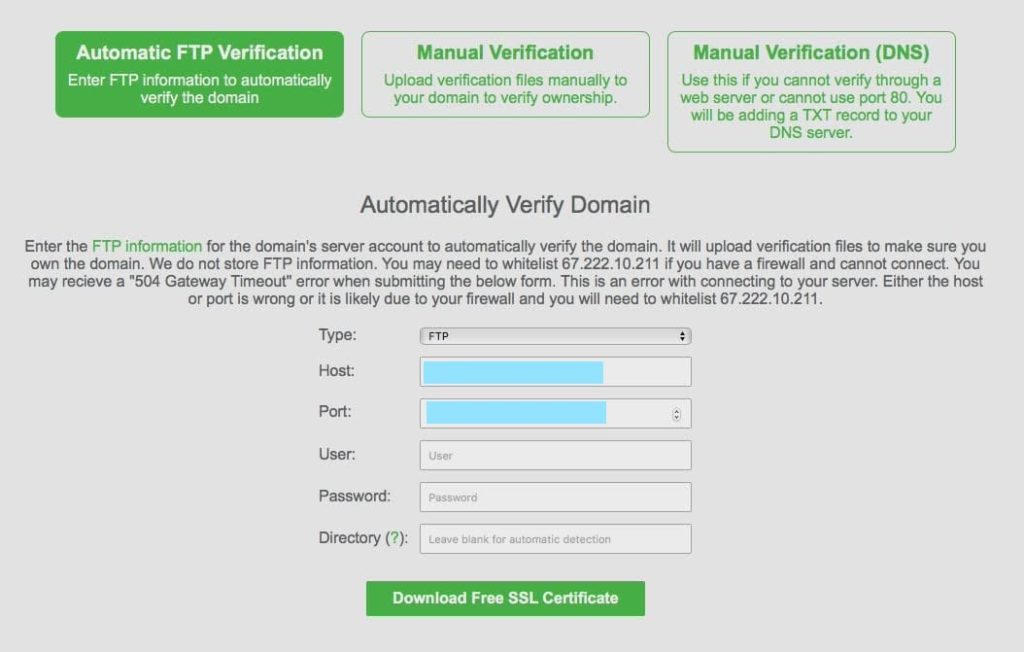
At this point you’ll have to verify the domain. This involves downloading two files and uploading them into a folder in your root domain directory and clicking a link, or entering FTP credentials and pointing it towards the folder. Optionally, you can add a TXT record to your domain DNS hosting file too, but it takes over an hour since GoDaddys shortest TTL refresh is 1 hour. All your doing at this point in laymens terms is just proving you own the domain before they generate an SSL certification. Basically choose one of the three big green buttons to choose your adventure and follow the instructions.

OPTION 1 – FTP VERIFICATION
This is pretty easy. Just put in the settings for your websites FTP account and it will create the directories and upload the verification files to your domains root.
OPTION 2 – MANUAL VERIFICATION
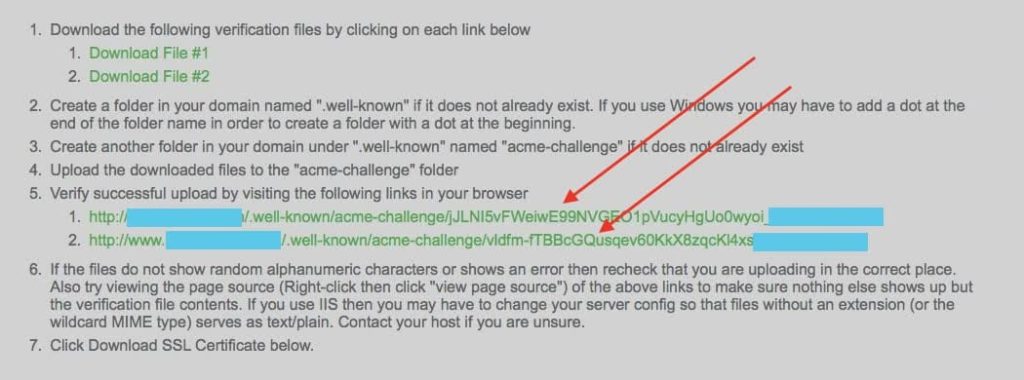
Pretty much the same thing, but you have to create the folders and upload the verification files yourself. Once they are uploaded, you have to click to links to verify the files are there.
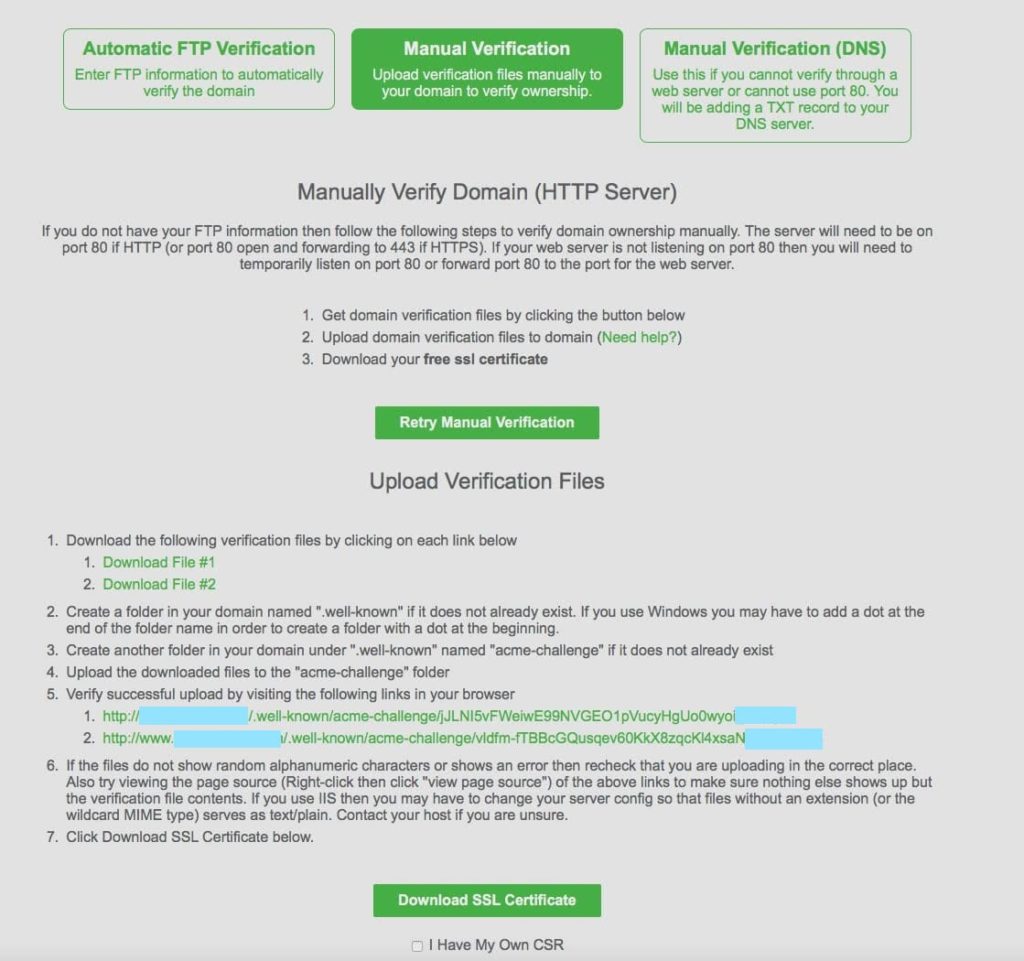
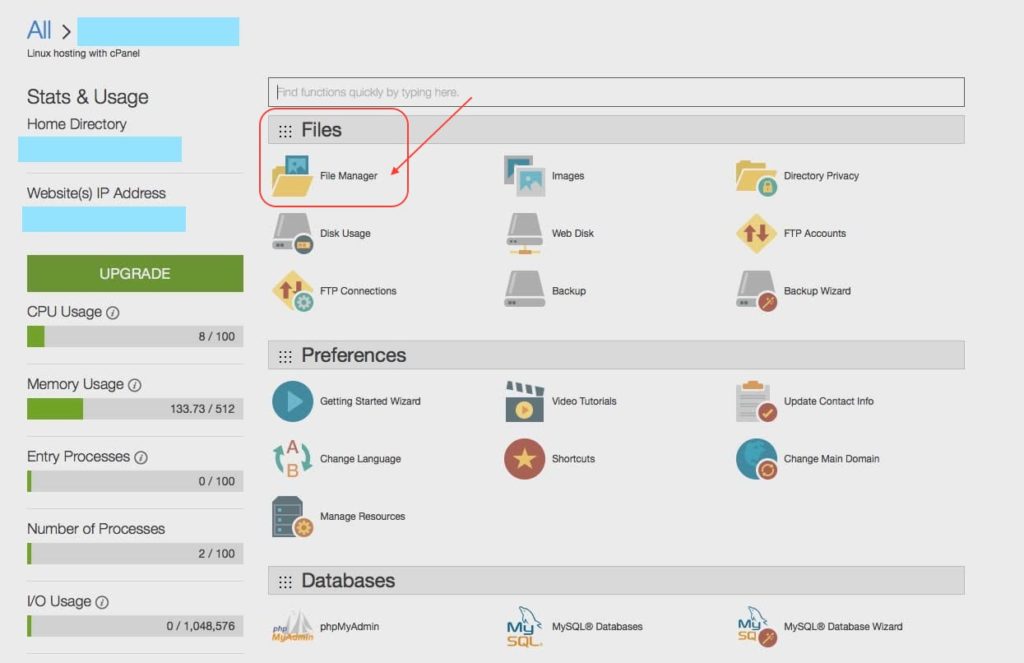
You’ll need to create a folder in the root of the domain you are installing the SSL in called “.well-known“, then INSIDE that folder, you’ll need to create another folder called “acme-challenge” to upload the verification files to. Open you GoDaddy account, click on your hosting and go into your cPanel. Choose “File Manager”. This is where you’ll upload the files.
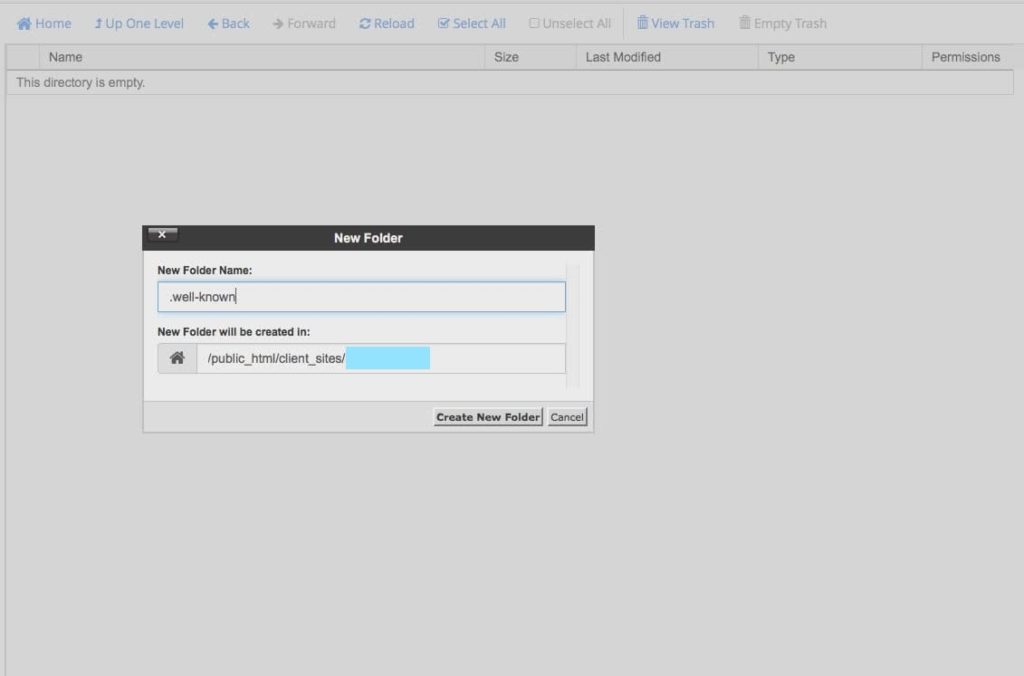
Create a new folder called: .well-known
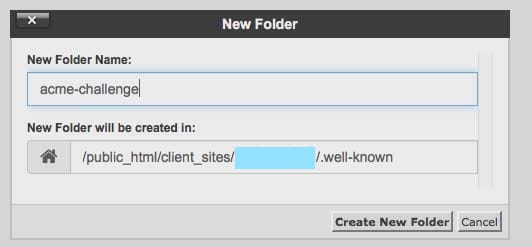
Inside that folder create a folder called: acme-challenge
Now jump back to the SSL for free page you still have open in the other tab or window. You’re going to want to download the two files and upload them to the new directory on the server:
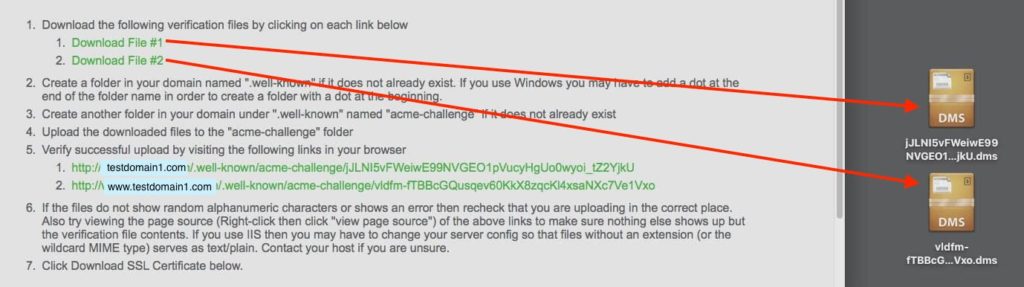
IMPORTANT NOTE: Once you’ve uploaded the two files, you’ll notice that they have a .DMS extension. I had to REMOVE the extension for this to work.

Once the files are there, go back to the SSL for free page and click the two links to verify the files are in the right place. You should get the same string of numbers in your browser when you click the links. If you don’t, you did something wrong or the permission on the folders aren’t right. I used 755 on the folders and 644 on the files.
NOTE: All you have to do is get the strings to appear in the browser window without a 404 error at both links. There is no “it worked” message or anything. This is just verifying that the certificate can see these two files.
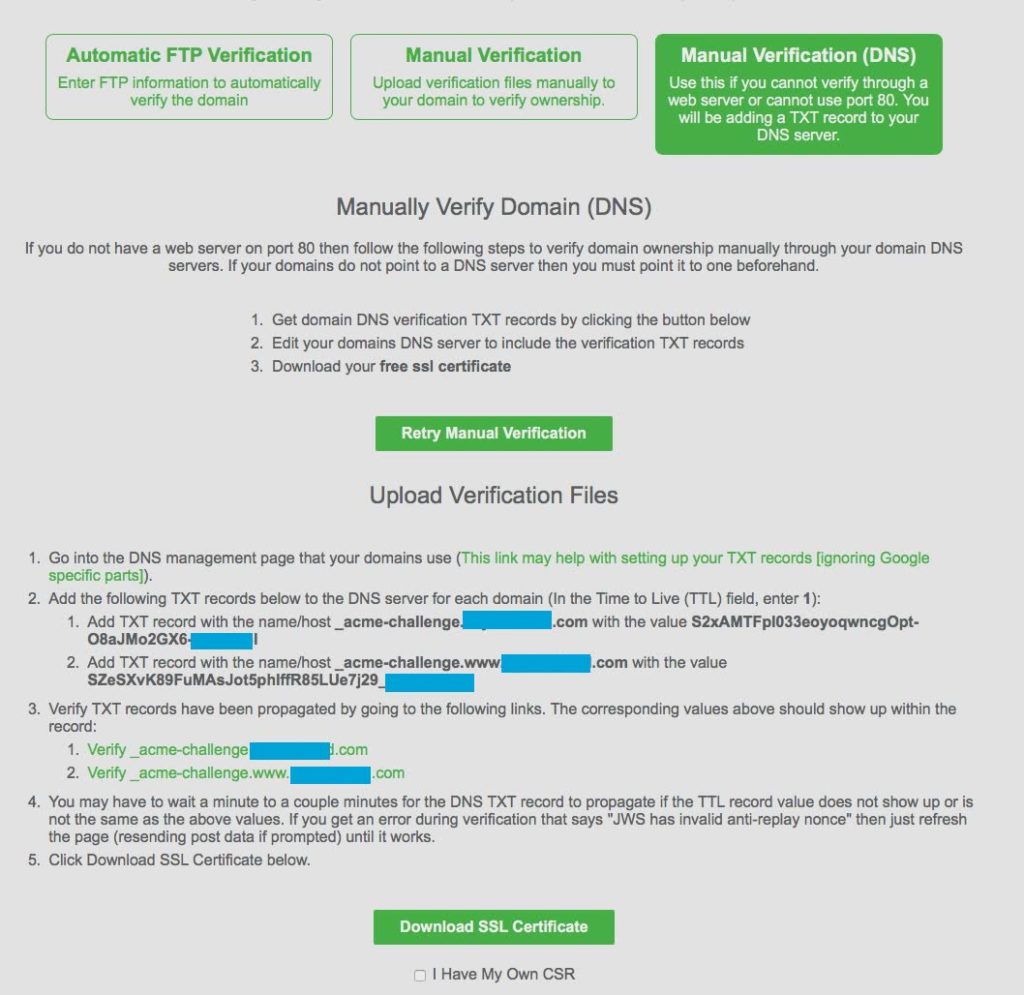
OPTION 3 – TXT DNS ZONE FILE VERIFICATION
The last option, this takes the longest with a GoDaddy cPanel account.
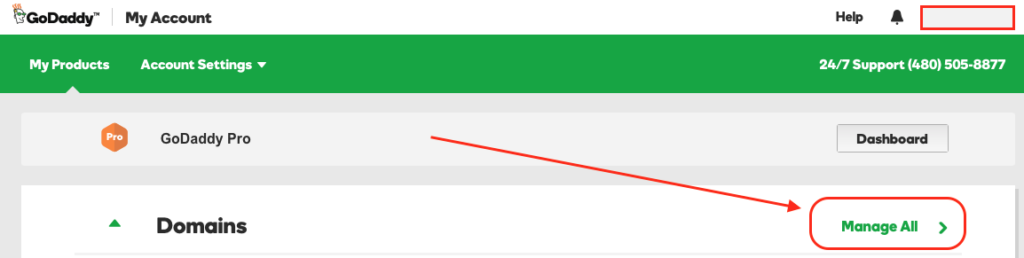
Go over to your GoDaddy account in the other tab or window you have open and click MY PRODUCTS from the menu if your not there already. Under your domains, click MANAGE ALL.
Click on the domain you are adding the SSL Certificate to so you can edit the DNS Zone File settings:
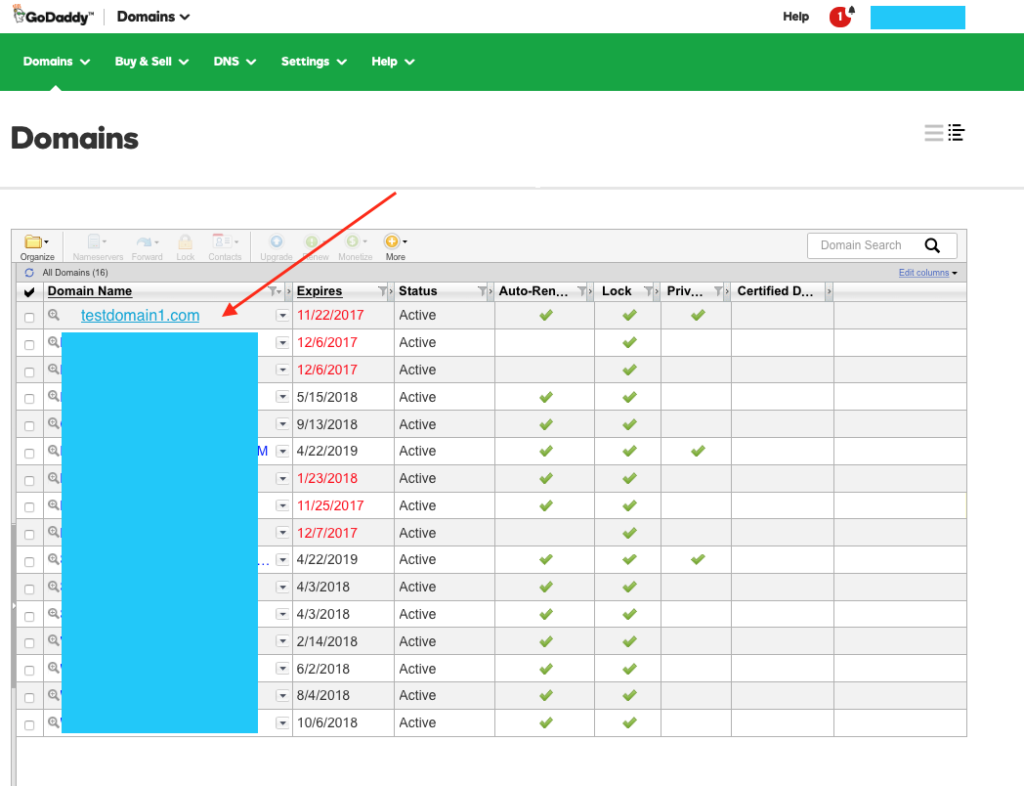
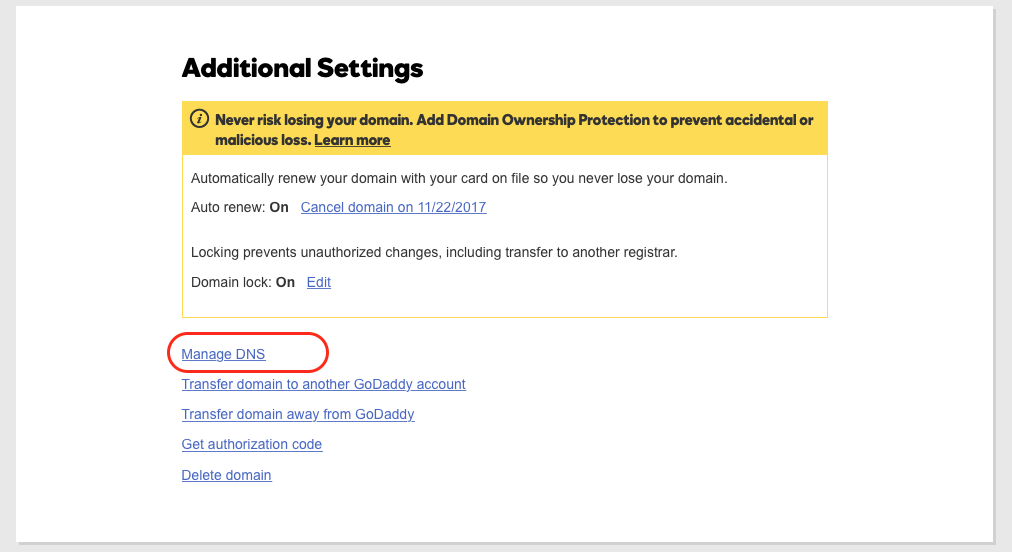
From here, scroll to the bottom and choose the MANAGE DNS link:
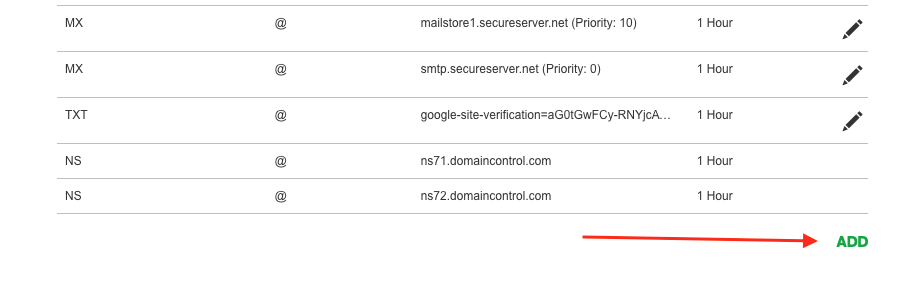
Scroll down and click “ADD” and choose TXT Record:
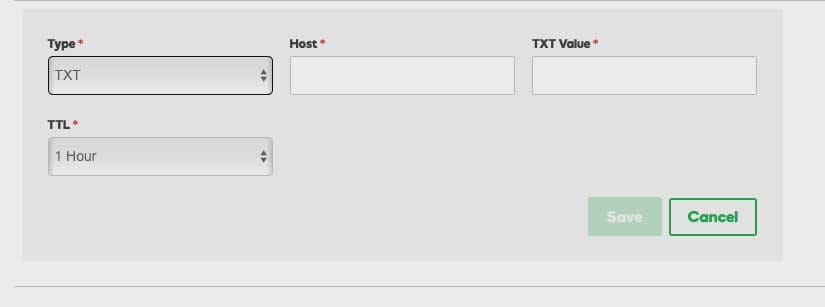
The first host is “_acme-challenge.testdomain1.com” then value is the long string of numbers.
The second host is “_acme-challenge.www.testdomain1.com” then value is the long string of numbers.
NOTE: Replace testdomain1.com with your domain name. You can just copy and paste these values from step (2) in the instructions with your specific values.
GETTING AND INSTALLING THE SSL
You made it to this point. Good for you!
All of this up to this point was just to get to the place where you could click this button at the bottom of the page.

Which oddly enough, doesn’t actually download anything. So if you’ve verified ownership of the domain, click away.
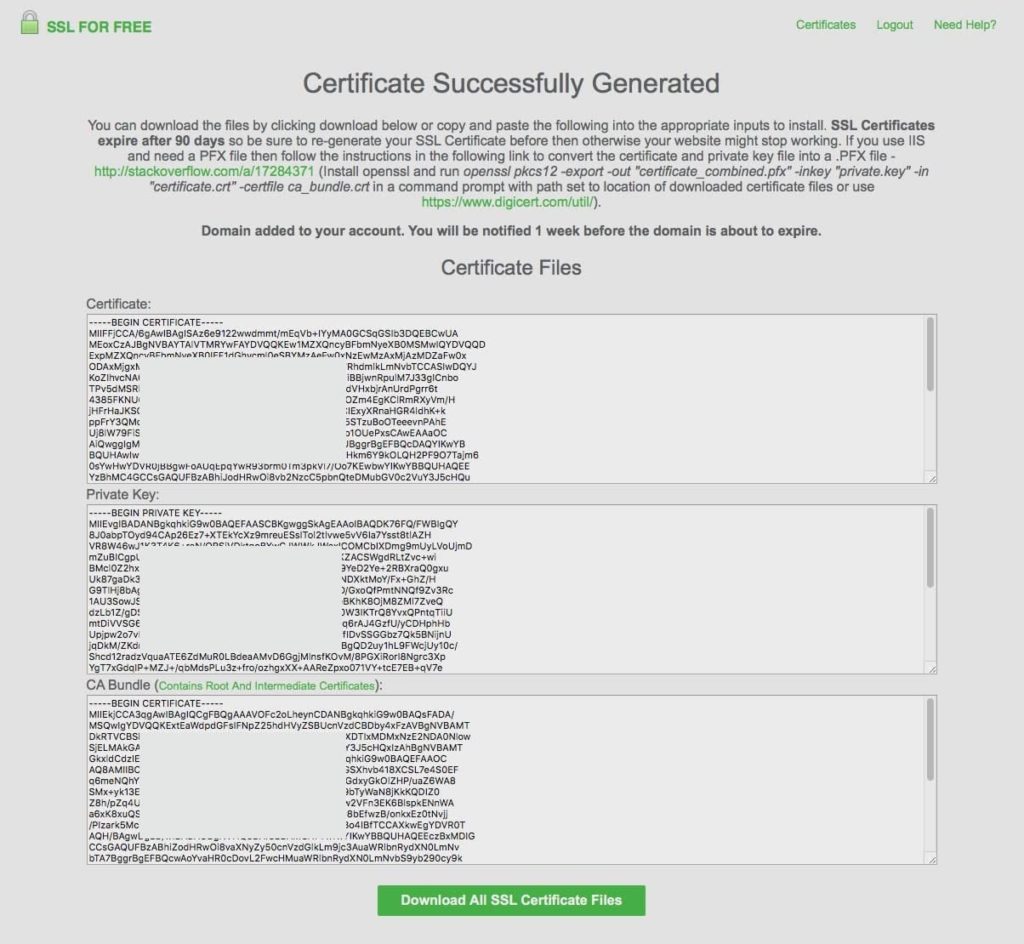
You’ll get a screen that looks like this. DO NOT CLOSE THIS WINDOW!!!!!
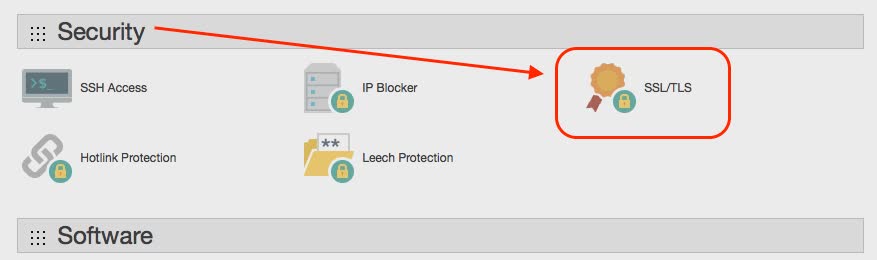
In your other tab or window, if your not in your cPanel, login now. Look for SSL/TLS under the SECURITY section and click on it.
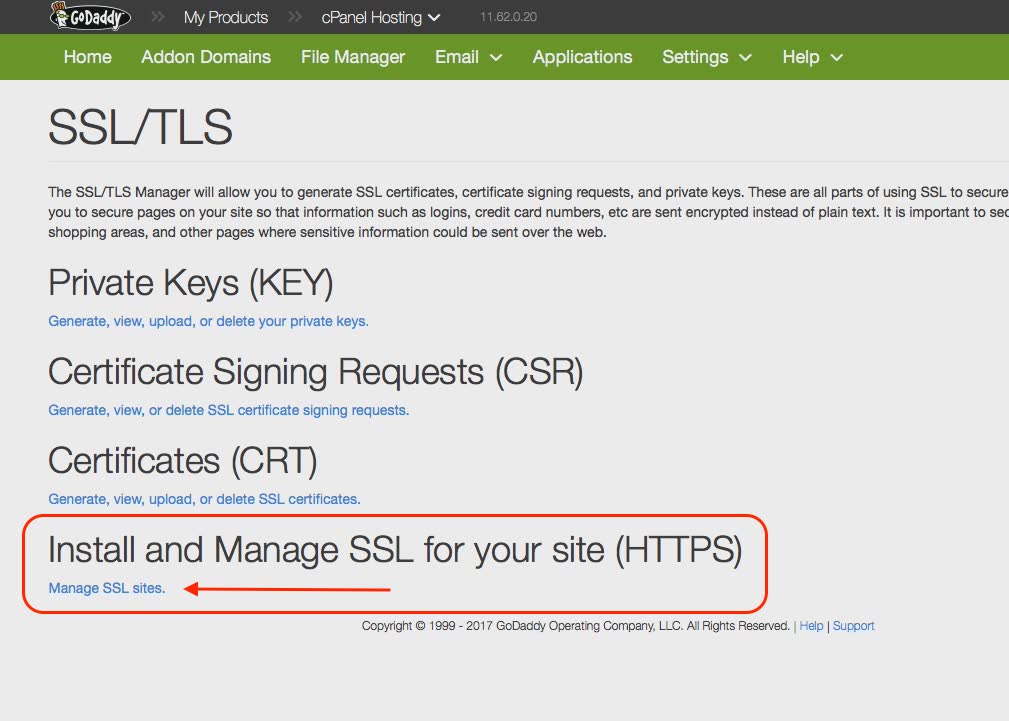
Then choose Install and Manage SSL for your site (HTTPS):
Choose your domain from the drop down menu. Then copy each section from the SSL for free site into the GoDaddy install screen into the corresponding sections.
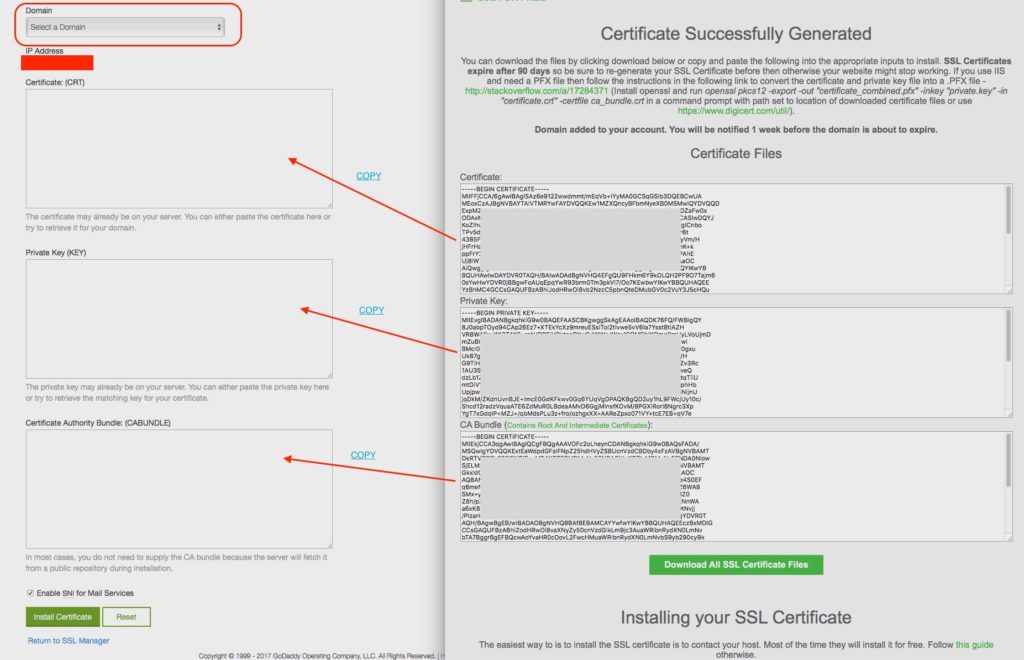
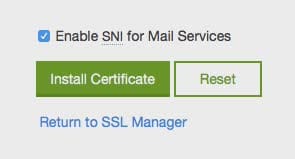
CHOOSE ENABLE SNI for securing mail traffic from this domain on the server, then click install certificate.
Your done with the GoDaddy part once you see this window. Take note that the SSL certificate will find the subdomain too if you host multiple domains on one cPanel account. i.e.: testdomain1.hosting.com. Also, if you clicked the Enable SNI for mail services, mail will be encrypted also.

IMPORTANT DON’T CLOSE ANY BROWSER WINDOWS YET
The next part is on the https://www.sslforfree.com page, CREATE AN ACCOUNT BEFORE YOU LEAVE THAT CERTIFICATION PAGE!!!!
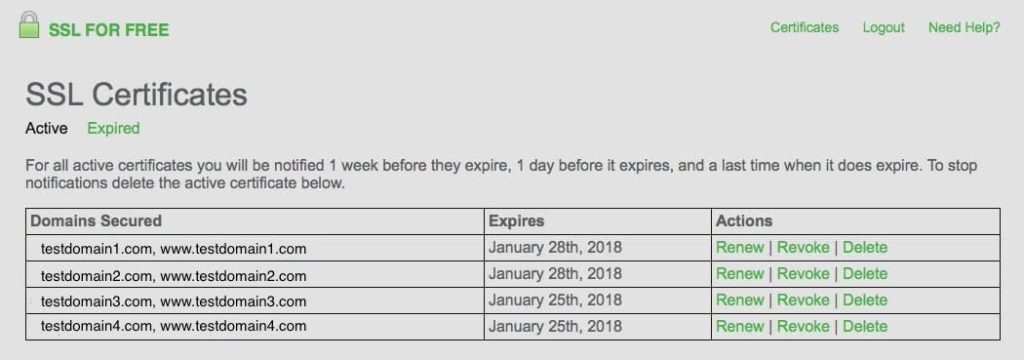
This will allow you to manage and rekey your SSL certificates. Remember, these certificates are only valid for 90 days, so you’ll need to log into your account and click the renew button every three months.
Whats handy about creating an account is that is will notify you to renew your certifications, as well as give you a handy list to view your active certifications.
LAST BUT NOT LEAST
If your using a content management system like WordPress, remember to login and change all your permalinks to HTTPS. If your using static HTML or PHP, then make sure and change all your on page link URL’s to HTTPS.
Also, to force HTTP to HTTPS on static sites you may also need also add an .htaccess file to force the redirect with a rule that looks something like this:
RewriteEngine On
RewriteCond %{HTTP_HOST} ^example\.com [NC]
RewriteCond %{SERVER_PORT} 80
RewriteRule ^(.*)$ https://www.example.com/$1 [R,L]
Make sure to replace example\.com with the domain name you’re trying force to https. Additionally, you need to replace www.example.com with your actual domain name.

